Author: Rob Coppola

  • Cold Stress Prevention for Outdoor Workers

    Cold Stress Prevention for Outdoor Workers

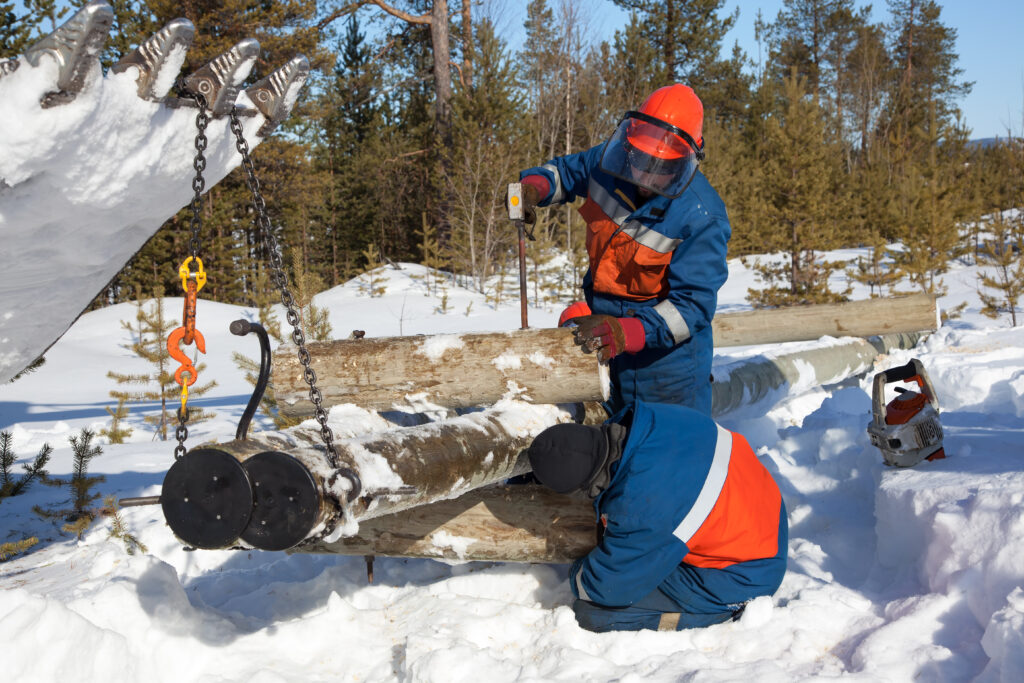
    Anyone working in a cold environment may be at risk of cold stress. This includes workers required to work outdoors in cold environments, and also indoor workers who spend the majority of their work shift in cold rooms
    without health and safety guidelines specific to these moderately cold temperatures.

    A cold environment drives down the skin temperature, and eventually, the internal body temperature. As a result, the body is forced to work harder to maintain its normal temperature. Whenever temperatures drop below normal and wind speed increases, heat leaves the body more rapidly, and the body’s ability to warm itself decreases. When the body is unable to warm itself, cold stress occurs. This can lead to serious cold-related illnesses and injuries, permanent tissue damage, and even death.

    Risk Factors That Contribute to Cold Stress

    Some of the risk factors that contribute to cold stress are:

    • Wetness, dampness, dressing improperly, and exhaustion.
    • Predisposing health conditions such as hypertension, hypothyroidism, and diabetes.
    • Poor physical conditioning.

    Injuries Due to Cold Stress

    Employees who work in cold temperatures are subject to illnesses or injuries induced by cold. The most common types are: frostbite, hypothermia, and trench foot.

    Frostbite
    In a cold environment, to keep its internal temperature warm, the body will begin to shift blood flow from the extremities (hands, feet, arms, and legs) and outer skin, to the core (chest and abdomen). This shift allows the exposed skin and the extremities to cool rapidly. In many instances, rapid cooling results in freezing of the skin and tissues, which is known as frostbite.

    Frostbite can cause permanent damage to the extremities, and in severe cases can lead to amputation. The risk of frostbite is increased in people with reduced blood circulation, and among people who are not dressed properly for extremely cold temperatures. Symptoms of frostbite include:

    • Reddened skin which develops gray or white patches in the fingers, toes, nose, or ear lobe.
    • Numbness, firmness, or hardness in the affected part.
    • Tingling, aching, loss of feeling, and blisters in the affected areas.

    Frostbite Treatment
    If a person is suffering from frostbite, loosely cover and protect the area from contact. Also, give warm sweetened drinks to the person if he or she is alert. However, those providing aid should never:

    • Rub the affected area to warm it
    • Apply snow or water to the affected area
    • Break blisters
    • Try to rewarm the frostbitten area before getting medical help
    • Serve alcohol to the affected person

    Hypothermia

    Prolonged exposure to cold temperatures causes the body to lose heat faster than it can be produced. The result is hypothermia, which occurs when the normal body temperature (98.6 °F) drops to less than 95 °F. Hypothermia is most likely at very cold temperatures, but it can occur even at cool temperatures (above 40 °F), if a person becomes chilled from rain, sweat, or immersion in cold water.

    Symptoms of hypothermia include shivering, loss of coordination, confusion, disorientation, dilated pupils, loss of consciousness, and slowed heart rate, pulse, or breathing. A person exhibiting these symptoms could die if help is not received immediately.

    Hypothermia Treatment
    The following measures should be taken to assist an employee who is suffering from hypothermia:

    • Call 911 immediately in an emergency; otherwise seek medical assistance as soon as possible.
    • Move the person to a warm, dry area.
    • Remove wet clothes and replace with dry clothes, cover the body (including the head and neck) with layers of blankets; and with a vapor barrier (such as a tarp or garbage bag). Do not cover the face.

    If medical help is more than 30 minutes away:

    • Give warm, sweetened drinks (no alcohol) if the person is alert, to help increase the body temperature. Never try to give a drink to an unconscious person.
    • Place warm bottles or hot packs in armpits, sides of chest, and groin. Call 911 for additional rewarming instructions.

    If the person appears to not be breathing, or to not have a pulse:

    • Call 911 for emergency medical assistance immediately.
    • Check for signs of breathing and for a pulse. Check for 60 seconds.
    • If after 60 seconds the affected worker is not breathing and does not have a pulse, trained workers may start rescue breaths for 3 minutes.
    • Recheck for breathing and pulse for 60 seconds.
    • If the worker is still not breathing and has no pulse, continue rescue breathing.
    • Only start chest compressions per the direction of the 911 operator or emergency medical services.

    Trench Foot

    Trench foot is caused by prolonged exposure to wet and cold temperatures. Trench foot can occur at temperatures as high as 60 °F if the feet are constantly wet. In such circumstances, injury occurs because wet feet lose heat 25 times faster than dry feet. To prevent such heat loss, the body constricts the blood vessels to shut down circulation in the feet. This deprives the feet of oxygen and nutrients, and causes a buildup of toxic products, resulting in the death of skin tissue.

    Symptoms of trench foot include:

    • Redness of the skin
    • Swelling
    • Numbness
    • Blisters

    The following measures can be taken to assist an employee suffering from trench foot:

    • Call 911 immediately in an emergency; otherwise seek medical assistance as soon as possible.
    • Remove shoes, boots, and wet socks.
    • Dry the feet.

    Determining Unsafe Temperature Using Wind Chill

    Outdoor workers exposed to cold and windy conditions are at risk of cold stress. Wind chill is the term used to describe the rate of heat loss from the human body resulting from the combined effect of low air temperature and wind speed. The wind chill temperature is a single value that takes both air temperature and wind speed into account. For example, when the air temperature is 40°F, and the wind speed is 35mph, the wind chill temperature is 28°F—this measurement is the actual effect of the environmental cold on the exposed skin.

    The National Weather Service offers a wind chill calculator an employer can use to calculate the wind chill temperature.

    Preventing Cold Stress

    Although OSHA does not have a specific standard that covers working in cold environments, employers have a responsibility to provide workers with a place of employment which is free of recognized hazards (including cold stress) that can cause death or serious physical harm to them.

    Here are 10 tips employers can use to help prevent employees who work in cold temperatures from developing cold stress:

    1. Train workers on how to prevent and recognize cold stress illnesses and injuries and how to apply first aid treatment.
    2. Monitor workers’ physical conditions.
    3. Schedule frequent short breaks in warm dry areas, to allow the body to warm up.
    4. Schedule heavier work during the warmest part of the day.
    5. Provide plenty of warm, sweetened liquids to workers, but avoid alcoholic drinks.
    6. Assign workers to tasks in pairs so that they can monitor each other for signs of cold stress.
    7. Acclimatize new workers and those returning after time away from work by gradually increasing their workload, and allowing more frequent breaks in warm areas, as they build up a tolerance for working in the cold environment.
    8. Provide engineering controls such as radiant heaters.
    9. If possible, shield work areas from drafts or wind to reduce chill.
    10. Allow workers to interrupt their work if they are extremely uncomfortable.

    The following safety tips can be used by employees to guard against cold stress:

    1. Wear at least three layers of loose fitting clothing. Layers should include an inner layer of wool, silk, or synthetic to keep moisture away from the body; a middle layer of wool or synthetic to provide insulation even when wet; and an outer wind and rain protection layer that allows some ventilation to prevent overheating.
    2. Wear a hat or hood to help keep your whole body warmer.
    3. Use a knit mask to cover the face and mouth (if needed).
    4. Use insulated gloves to protect the hands (water resistant if necessary).
    5. Wear insulated and waterproof boots (or other footwear).
    6. Monitor your physical condition and that of your coworkers.
    7. Stay dry, as moisture or dampness (e.g., from sweating) can increase the rate of heat loss from the body.
    8. Keep extra clothing (including underwear) handy in case you get wet and need to change.
    9. Drink warm sweetened fluids, but no alcohol.

    Additional Information

    OSHA Safety and Health Cold Stress Guide
    Cold Stress (NIOSH)

  • Night Driving 101 | Less Daylight Calls for Extra Awareness While Driving

    Night Driving 101 | Less Daylight Calls for Extra Awareness While Driving

    Did you know that the rate of traffic deaths at night is three times greater than driving during the day? It is more difficult to see hazards ahead on the road, and often the lack of scenery can be hypnotizing, sending you into a state of dangerous drowsiness. If your job requires that you drive after dark, it is important to remember the challenges you may face on the road.

    Daylight Savings Time ends at 2:00AM on Sunday, November 5, 2023 which means shorter days and more time driving in the dark. It’s a good time to refresh yourself on nighttime road safety.

    Use these safety tips to prevent night driving accidents:

    • Turn on your headlights one hour before sunset and one hour after sunrise so other drivers can see you easily. Make sure all of your exterior lights are working properly.
    • Refrain from looking into your rearview mirror at oncoming headlights. Use the “day-night” feature to reduce the light.
    • Do not look directly at oncoming headlights. Look toward the right side of the road, following the white line with your eyes.
    • Dim your dashboard lights if excess street lighting is causing a glare.
    • Keep your windows clean, as dirty windows can reduce visibility by up to 90 percent. Increase your following distance by four or five seconds to give yourself more response time. Slow your speed, especially in dangerous weather conditions.
    • Adjust your outside mirrors so that the view is just outside of the bodywork of the vehicle. Avoid smoking, as the nicotine and carbon monoxide hampers night vision.
    • Keep your headlights on low beams when following other vehicles.
    • If you have vehicle trouble, pull off the road as far to the right as possible and set up reflector triangles near your vehicle and up to 300 feet behind it. Turn on your flashers and your dome light, and call for assistance.

    Combat fatigue while driving

    • Don’t drive if you’ve been awake for over 16 hours.
    • Make stops to use the restroom, stretch your legs and have a snack to reduce fatigue. If you get too tired while driving at night, stop and take a rest.
    • Pull over and take a nap if you’re feeling drowsy.

    Tips for older or compromised drivers

    • Schedule annual vision exams
    • Check your prescription drugs for side effects that may impair your driving.
    • Reduce your speed to a safe level to allow for more reaction time.

    Put Yourself First

    Wherever your final destination, your safety on the road is more important than arriving on time. If you feel that you are unfit to drive for any reason—whether it is drowsiness, alcohol, or any other reason—do not get behind the wheel.

    If you have any questions about your company’s safety policies regarding driving, contact your supervisor. Your safety is first priority!


    This safety matters flyer is for general informational purposes only, and is not intended as medical or legal advice. © 2010, 2014, 2019 Zywave, Inc. All rights reserved.
  • Hand Tool Safety

    Hand Tool Safety

    Imagine that when you are striking a nail with a hammer, part of the hammer’s handle breaks off and hits you in the eye. How about breaking the bones in your hand when it is crushed by a press that you were attempting to adjust with slippery pliers instead of a wrench?

    Keep Safety in Mind
    Hand and power tools are such a common part of the job that we often take them for granted. However, their use can be extremely hazardous if the right safety procedures are not followed. To keep yourself safe, follow these basic rules:
    • Keep all tools in good condition with regular maintenance.
      • If a wooden handle on a tool is loose, splintered or cracked, the head can fly off.
      • If the jaws of a wrench are sprung, the wrench can slip.
      • If impact tools such as chisels, wedges or drift pins have mushroomed heads, they can shatter on impact.
    • Use the right tool for the job.
      • If a chisel is used as a screwdriver, there is a danger of the tip flying off.
      • Each job calls for a specific tool. Never deviate.
    • Examine each tool for damage before using it and never use damaged tools. Alert your supervisor that these tools are in need of repair.
      • Tools used for cutting edges must be sharp. Dull tools can be more hazardous as you must press harder when using them.
    • Operate tools according to the manufacturer’s instructions.
      • Iron or steel tools produce sparks that can ignite flammable substances. Check for spark-resistant tools made of alternative materials when you are around flammable gases, volatile liquids or other explosive materials.
      • When using sharp tools, direct the tools away from aisle areas and away from other employees working close to you.
    • Use the right personal protective equipment.
      • Loose clothing, ties or jewelry should never be worn when using hand or power tools.
    • Store and transport the tool properly as soon as you are done with it.
      • Put the tool away as soon as you are done with it. Leaving the tool in a walkway presents a tripping and impalement hazard.
      • Transport tools in a tool box or cart, or carry them in a tool belt. Never carry pointed tools in your pocket.
      • Never throw tools to another employee. Always pass them with the handle toward the receiver.
      • Use a bucket or bag for lifting or lowering tools from one level to another.
      • When carrying a tool on your shoulders, pay attention to clearances and other workers.

    Requirements for Specific Tools

    • Keep fingers away from saw blades.  Clamp materials down and keep all guards in place.
    • Do not use compressed air to clean people and when cleaning equipment, pressure is to be regulated to no more than 30 PSI.
    • When performing electrical work, ensure the use of insulated, rated tools.
    • When using pneumatic tools, a safety clip or retainer must be installed to prevent the equipment or hoses from coming apart.  Never point pneumatic tools at anyone.
    • All hand grinders must be used with the guards and handles in place. Impact tools, such as drift pins, wedges, and chisels, shall be kept free of mushroomed heads.
    • The wooden handles of tools shall be kept free of splinters or cracks.
    • Before an abrasive wheel is mounted, it should be inspected closely to be sure that it is free from cracks or defects.
    • Where flammable atmospheres exist, spark-resistant tools made from brass, plastic, aluminum, or wood may help prevent creating an ignition source.
    Speak Up
    If you have any doubt about the safe use of a hand or power tool – or about any safety issue on the job – talk to your supervisor. Your safety is our first priority at Lawley.
    This safety matters flyer is for general informational purposes only, and is not intended as medical or legal advice. © 2015, 2019 Zywave, Inc. All rights reserved.
  • Improving Scaffolding Safety in Construction

    Improving Scaffolding Safety in Construction

    Work Site Scaffolding Safety

    The majority of scaffold accidents on the construction site are caused by falls, slipping, or being struck by an object from above. All of these accidents can be prevented by taking the proper precautions. Working at heights of any level increases these workers’ risk of injury from falling and in 2020, 3,250 workers suffered injuries due to scaffolding.

    Review this guidance to learn more.

    General Safety Tips

    • To prevent slipping hazards, conduct a daily routine inspection to ensure all walking and working surfaces are free from potential hazards. If you spot a hazard, remove it.
    • Never move, dismantle or alter a scaffold unless under the supervision of a qualified person while doing such activities.
    • Never move a scaffold with workers still on it.
    • Keep scaffold loads below maximum capacity and remove your equipment when the scaffold is not in use.
    • Be alert for bad weather. High winds and driving rain and snow can be dangerous when working at high levels.
    • Be aware of your proximity to overhead power lines that could potentially lead to electrocution.

    Protection for Those Below

    • Always hoist up heavy tools, equipment and supplies, rather than carry them up by hand.
    • There must be a 3½”-high toe board to prevent things falling off a scaffold. If things on the scaffold are taller than 3½” (above the toe board) other systems, like debris nets, must be used to catch falling tools or materials.
    • Always wear a hard hat when working on and around a scaffold.
    • Never walk under or near the scaffold if roped off when work is being performed above.

    Fall Protection Basics

    To help protect you against potentially deadly falls, fall protection is needed when working 6 feet or more above a lower level, and consists of either a personal fall arrest system or guardrail systems, depending on the job. If using a fall arrest system, keep the following in mind:

    • Always attach your lanyard to a vertical lifeline, horizontal lifeline or scaffold structural member.
    • If you are using a vertical lifeline, be sure you are fastened to a fixed safe point of anchorage, independent of the scaffold. This includes structural members of buildings, but not standpipes, vents, or electrical conduit. These items may give way under the force of a fall.
    • Clean and test your gear regularly, and never tamper with your fall protection system.

    Falls are the leading cause of death for construction workers, and 86% of deaths in the construction industry are due to scaffolding. Other factors that contribute to injury include:

    • Lack of fall protection for the worker and no fall protection program in place
    • Inexperienced or untrained workers who cannot identify common fall hazards
    • Unstable work surfaces with no guardrails or wheels left unlocked before a worker climbs the platform
    • Workers left alone on scaffolding during off hours

    OSHA Regulations and Employee Training

    OSHA also offers training courses on scaffold safety. In 1996, when OSHA revised its scaffold standards, the Bureau of Labor and Statistics found that 25% of workers received no training on scaffold safety. Training is key in protecting workers from debilitating accidents due to scaffolding.

    When working on scaffolding, your safety is our top priority. For more safety tips, talk to your supervisor.

    This Safety Matters flyer is for general informational purposes only, and is not intended as medical or legal advice. © 2009-2010, 2014, 2019 Zywave, Inc. All rights reserved.
  • Workers’ Comp Construction Class Codes/Rates Changes

    Workers’ Comp Construction Class Codes/Rates Changes

    CLICK HERE to read the full notice from the NYCIRB.

    Effective October 1, 2021

    As part of our mission to keep our clients informed, please be aware of the following information regarding the Workers’ Compensation changes effective on policies renewing on or after October 1, 2021:

    1. CLICK HERE to view the NYS Workers’ Compensation Construction Class Codes/Loss Costs – Base Rates

    2. Average decrease is 1.0% (different per code/classification)

    3. The payroll cap has increased from $1450.17 to $1594.57 on policies renewing on or after July 1, 2021

    4. The NYS assessment fee has decreased to 11.8%

    5. The Territorial Surcharge is still 0%

    6. Construction Employment Weekly Payroll Assignments are as follows:

    [table id=12 /]

  • NYS Workers Compensation Construction Class Codes/Rates Changes Effective October 1, 2019

    NYS Workers Compensation Construction Class Codes/Rates Changes Effective October 1, 2019

    NYS Workers’ Compensation Construction Class Codes/Loss Costs – Base Rate Update

    As part of our mission to keep our clients informed, please be aware of the following information regarding the Workers, Compensation changes effective on policies renewing on or after October 1, 2019.

    1. Average decrease is 10.0% (different per code)

    2. The payroll cap has increased from $1,357.11 to $1401.57 on policies renewing on or after July 1, 2019

    3. The NYS assessment fee has increased to 12.6%

    4. The Territorial Surcharge is still 0%

    5. Construction Employment Weekly Payroll Assignments are as follows:

    Maximum Minimum
    Executive Officers, Sole Proprietors and Partners
    (Construction Employments)
    $1,401.17* $725.00
    All other Construction Employees $1,401.17* N/A
    Executive Officers (Non-Construction) $2,200.00 $725.00

    *Applies to policies renewing on or after July 1, 2019

    Click here to download the entire document.

  • OSHA Delays Electronic Reporting Deadline

    OSHA Delays Electronic Reporting Deadline

    OSHA, or the Occupational Safety and Health Administration, has certain rules and requirements for individuals and organizations. However, it also has requirements for itself.

    One of the most recent requirements OSHA set forth for itself was the electronic reporting rule. This rule requires certain organizations to report information electronically from their OSHA Forms 300, 300A and 301. Additionally, under the rule, OSHA must create a secure website where this required information will be submitted.

    The original deadline to have the website running and having the electronic reporting rule in effect was July 1st, 2017. However, OSHA will NOT have its website ready to receive electronic reports from employers by the deadline.

    No new reporting deadline has been put out by OSHA yet and they have NOT officially delayed the July 1st deadline, even though the website will not be ready in time.

    Establishments that could be affected should continue to record and report their workplace injuries as required by law and keep updated on these new reporting regulations and developments. Especially in the case that a new deadline should be adopted.

    Lawley Construction will stay abreast of these changes and will alert our clients as soon as a new deadline, if any, is released.

  • What is a Certificate of Insurance?

    Effective on July 28, 2015, an amendment to the New York insurance law will go into effect that makes it illegal to request a certificate of insurance to include language of any kind, including warranties of coverage,not found in the underlying policy. The Department of Financial Services may fine violators (including issuers & requestors) $1,000 for the first offense & $2,000 for each subsequent.

    What Is A Certificate of Insurance?

      A certificate of insurance is a document that is used to provide information on specific insurance coverage. The certificate of insurance provides verification of the insurance and usually contains information on types and limits of coverage, insurance company, policy number, named insured, and the policies’ effective periods. These details include:

    • Description of an organization’s insurance coverage at a specific point in time
    • Document for conveying information, not for guaranteeing coverage
    • A certificate cannot change a policy’s coverage or confer additional rights on the certificate holder

    Who Does The Certificate of Insurance Law Apply To?

    • Individuals,businesses, associations and other entities
    • Public entities (the State of New York, counties, cities,towns, villages, school districts, public libraries,public corporations & similar entities)
    • New York State,local,interstate and international public authorities and their employees, officers and elected officials

    What Does the Law Change?

    Certificate holders may still request minimum insurance requirements for coverage limits,terms and other conditions. However they CANNOT REQUIRE their certificate to include any of the following:
    If the items are not provided within the insurance policy:

    • Terms
    • Conditions
    • Language
    • Warranties
    • Guarantees

    What Are Acceptable Certificate of Insurance Forms?

    Certificate holders can only request a certificate that is:

    • A form issued by the insurer providing the coverage
    • A standard certificate form issued by an insurance industry standard-setting organization (such as ISO or ACCORD) and approved by the New York State Department of Financial Services, or
    • Any other form approved by the DFS

    Prohibitions

    Certificate holders may not require a certificate as a condition to:

    • Award contracts
    • Permit work to start;or
    • Pay for work completed

    Unless their requested certificate is one of the three acceptable forms indicated above.

    To find out more about this Certificate of Insurance law change, contact our team here.

  • New York State Workers Comp Assessment Rate Will Drop in 2015

    Late last week, New York State Governor Andrew Cuomo announced that New York’s workers comp assessment rate will drop from 13.8 percent to 13.2 percent for Workers Compensation policies renewing on or after 1/1/15.

    The new assessment rate of 13.2% will take effect Jan. 1. If you have any questions about how this might affect your workers compensation policy, contact our team here.